Connecting to the MCP
Last updated: August 24, 2026
Connect your favorite AI tools, to query and act on Superfiliate on your behalf in plain language, with the flexibility an MCP connection unlocks. Every tool and feature available through the UI is also available for your agentic workflows.
Sign In
Connecting more than one shop? How you sign in decides what you can authorize. Only an email login can connect several shops at once — see Providing Email-Only Access to Superfiliate.
This flow is made easier if you make sure you are already signed in to Superfiliate beforehand.
Shopify sign-in
If you have a Shopify shop, most of the scenarios you would sign-in through here:
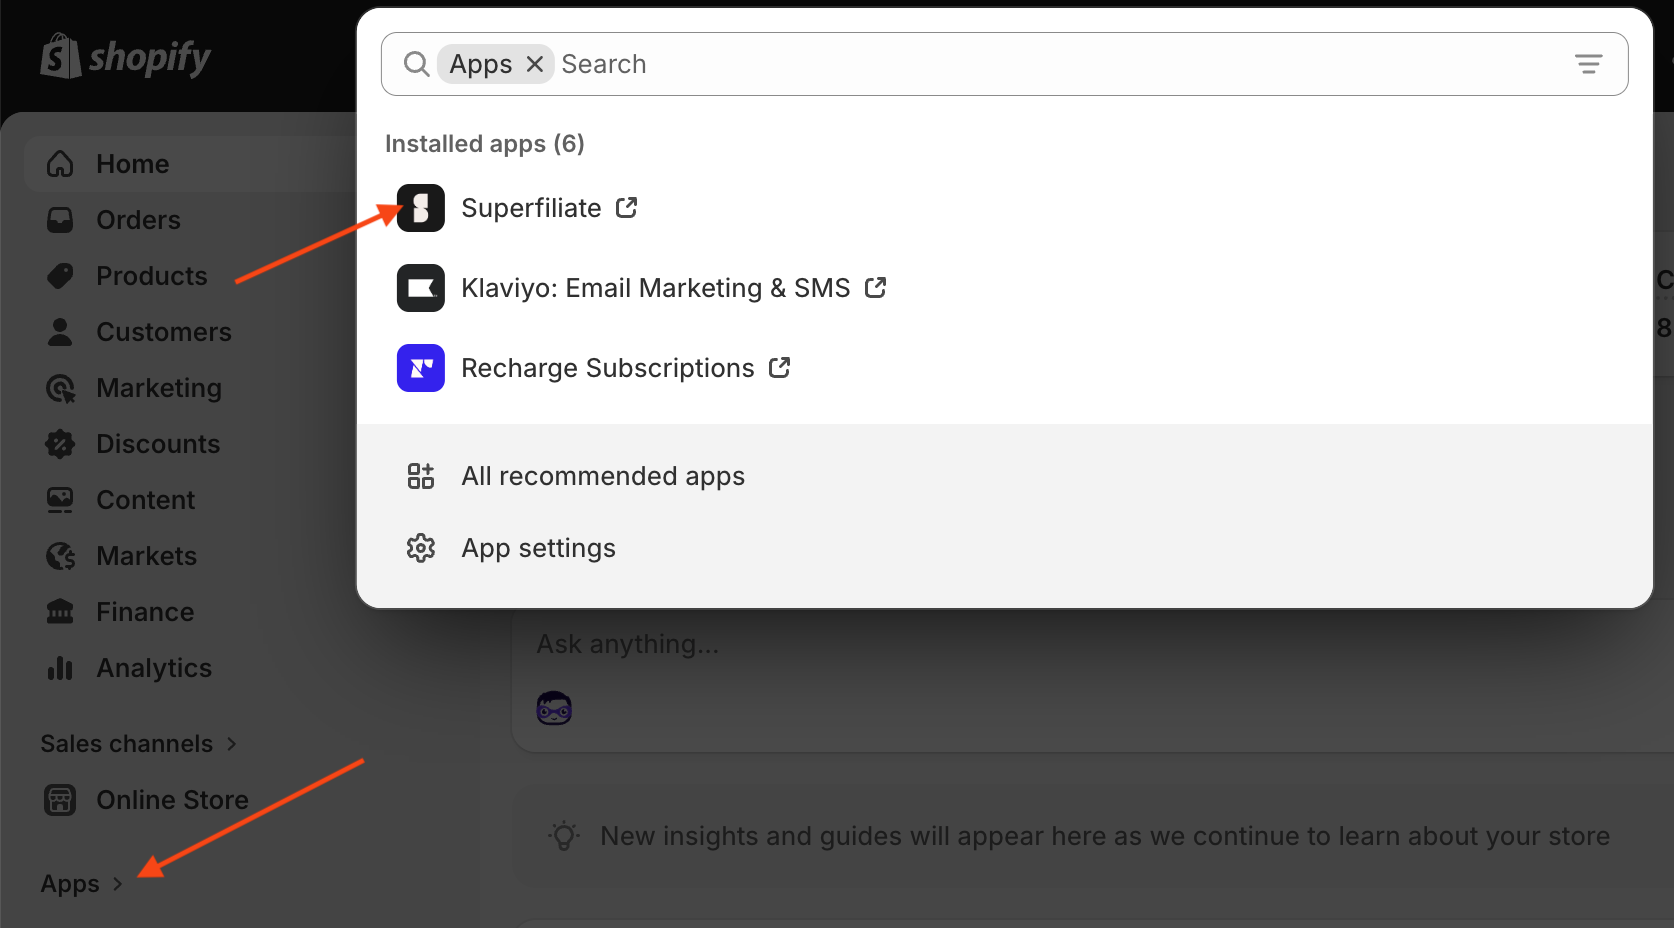
https://admin.shopify.com/, get into your Shopify admin
Then from the sidebar, click "Apps" and then "Superfiliate"
Superfiliate will open on a new tab, and showing you the dashboard. All good, it means you are signed in and good to proceed!
⚠️ A Shopify sign-in is scoped to that single Shopify store. On the authorization screen you'll see that one store and nothing else — this is a limit of how Shopify confirms access, not a setting. If you run more than one store, use the email sign-in below instead.
Non-Shopify sign-in
This is the right path if you work across more than one brand, are an agency without direct Shopify access, or work only in Meta, TikTok, or YouTube.
https://auth.superfiliate.com/sign-in, and pick the brand if you have access to many.
Superfiliate will open, showing you the dashboard. All good, it means you are signed in and good to proceed!
Don't have an email login yet, or only see one brand when you should see several? Each brand has to invite your email separately — here's how to get set up.
Claude
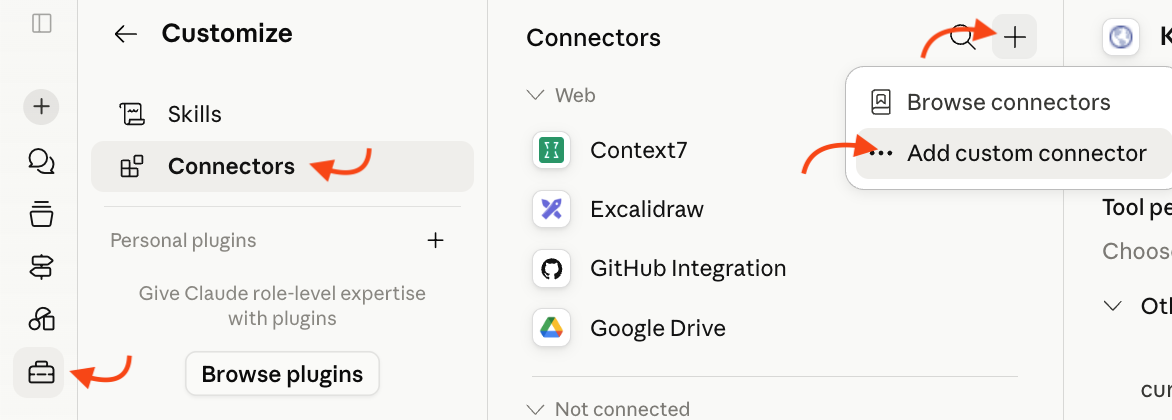
Click the Toolbox icon, for the "Customize" menu;
Click "Connectors", and then the "+" icon;
And click the "Add custom connector" option;
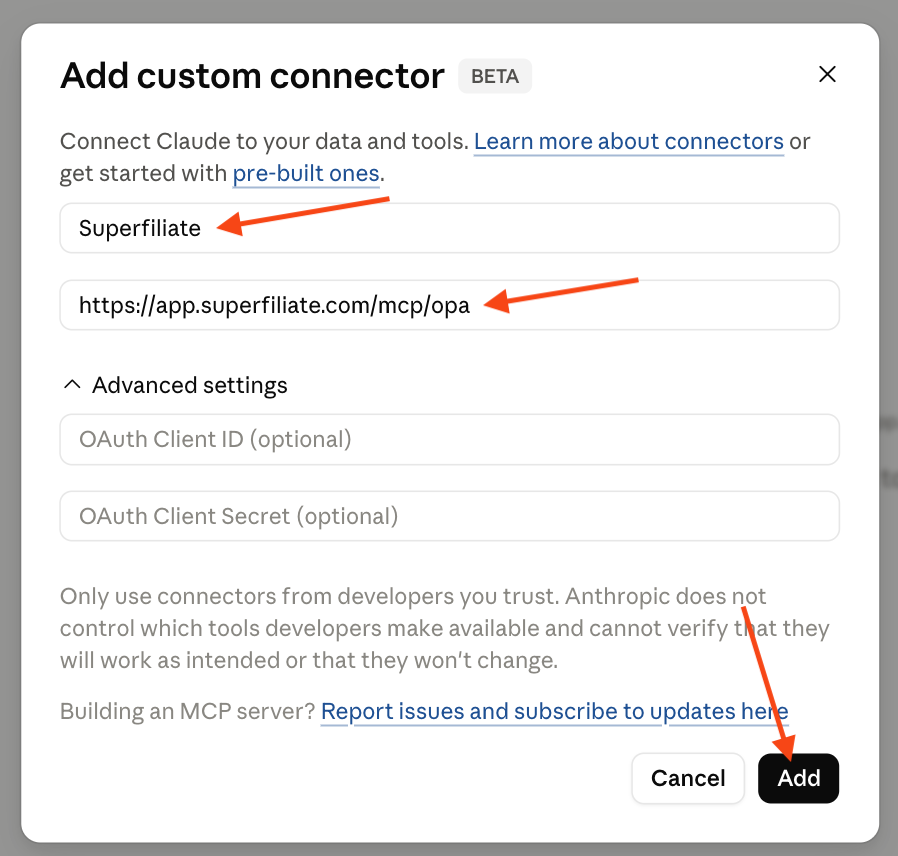
Fill the name and URL on the window that opens;
With
Superfiliateandhttps://mcp.superfiliate.comThe "Advanced settings" and OAuth settings should be left blank!
Then click "Add";
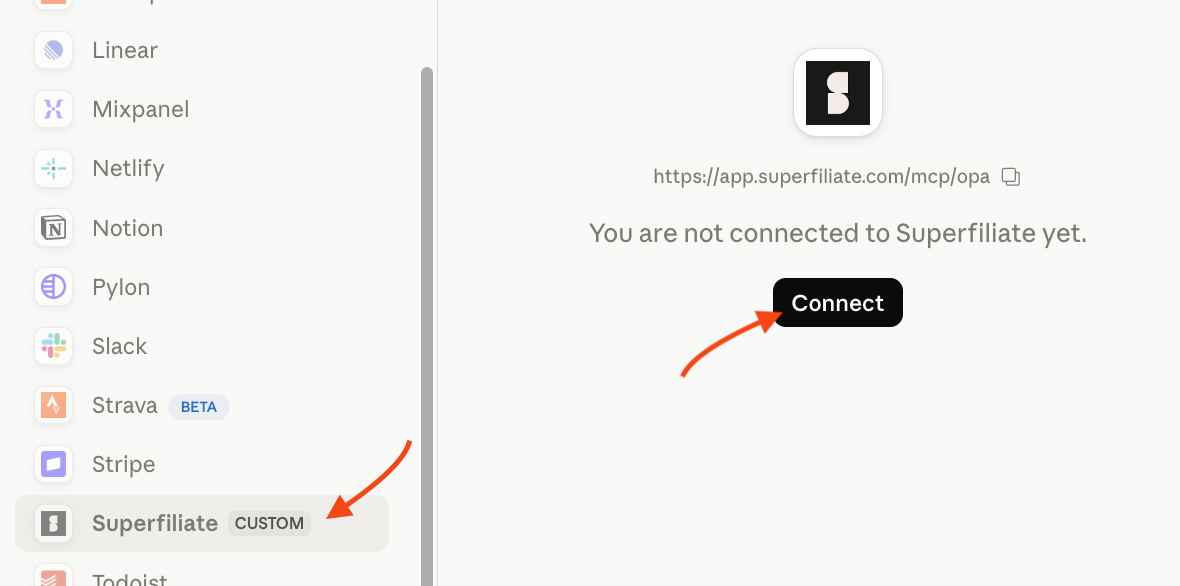
Make sure you have the fresh "Superfiliate" MCP selected, then click on "Connect";
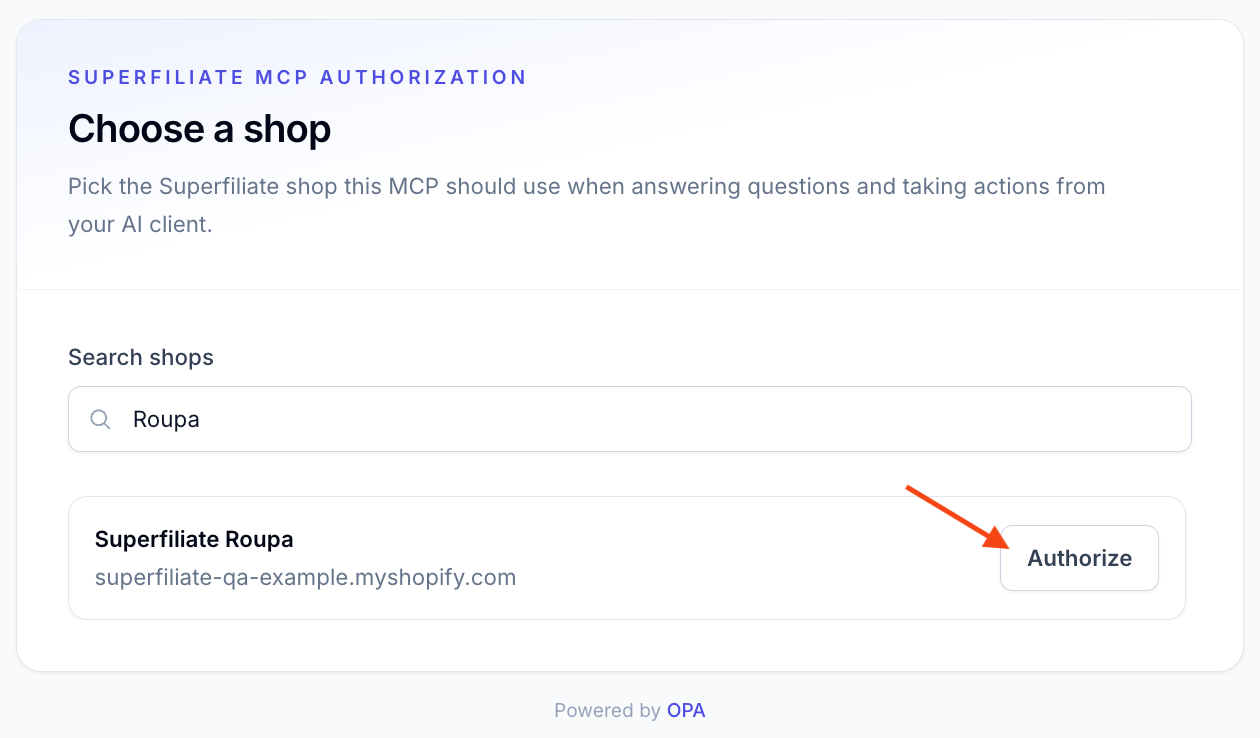
Choose the shops this connection should use, then click "Authorize". Signed in with your email, you can tick up to 10 shops, or choose "All shops you have access to" to include ones you are added to later. Signed in through Shopify, you will see only that single store.
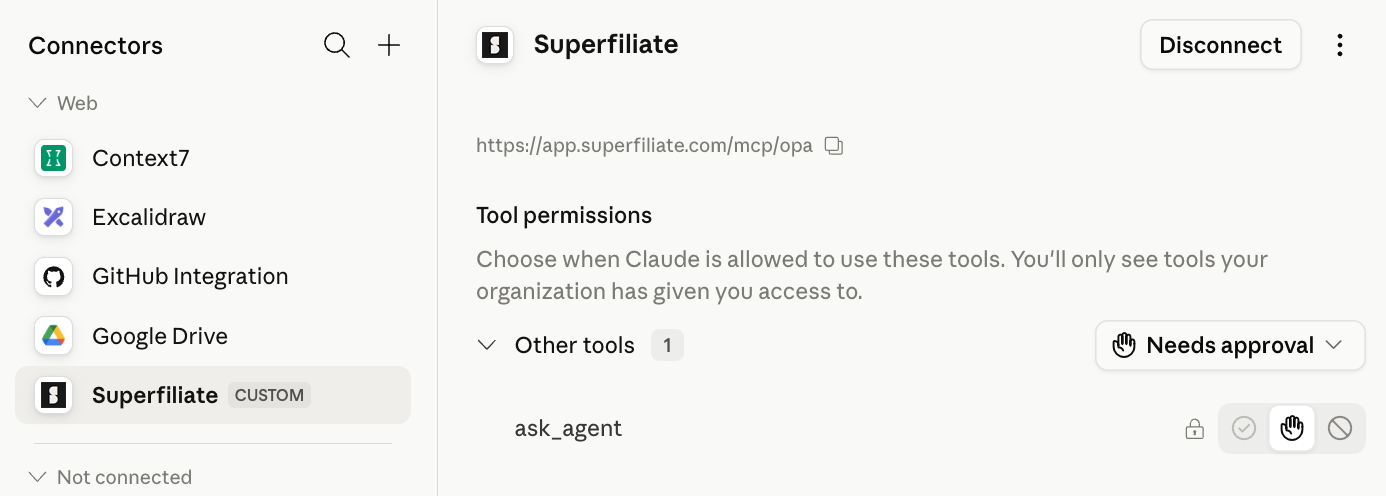
You should be able to see that the MCP is now available;
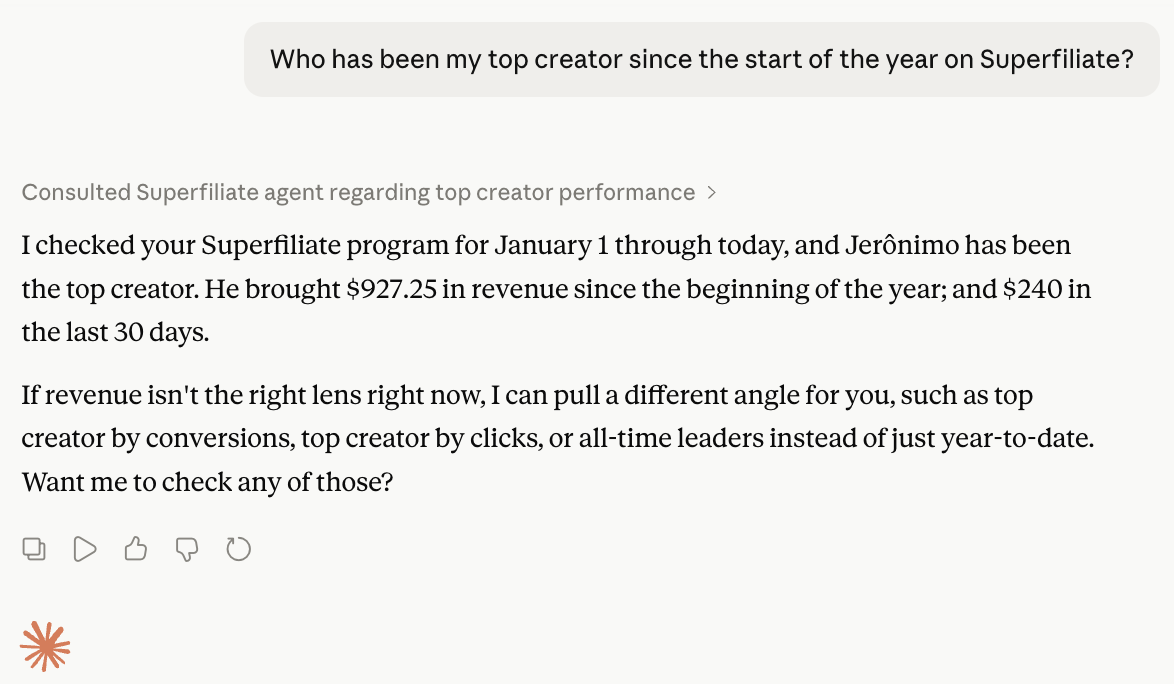
You can then test it, by going to a chat/agent and asking it about some Superfiliate data 🎉.
ChatGPT
Open ChatGPT, then click into "Plugins."
Click the settings (gear) icon in the top right.
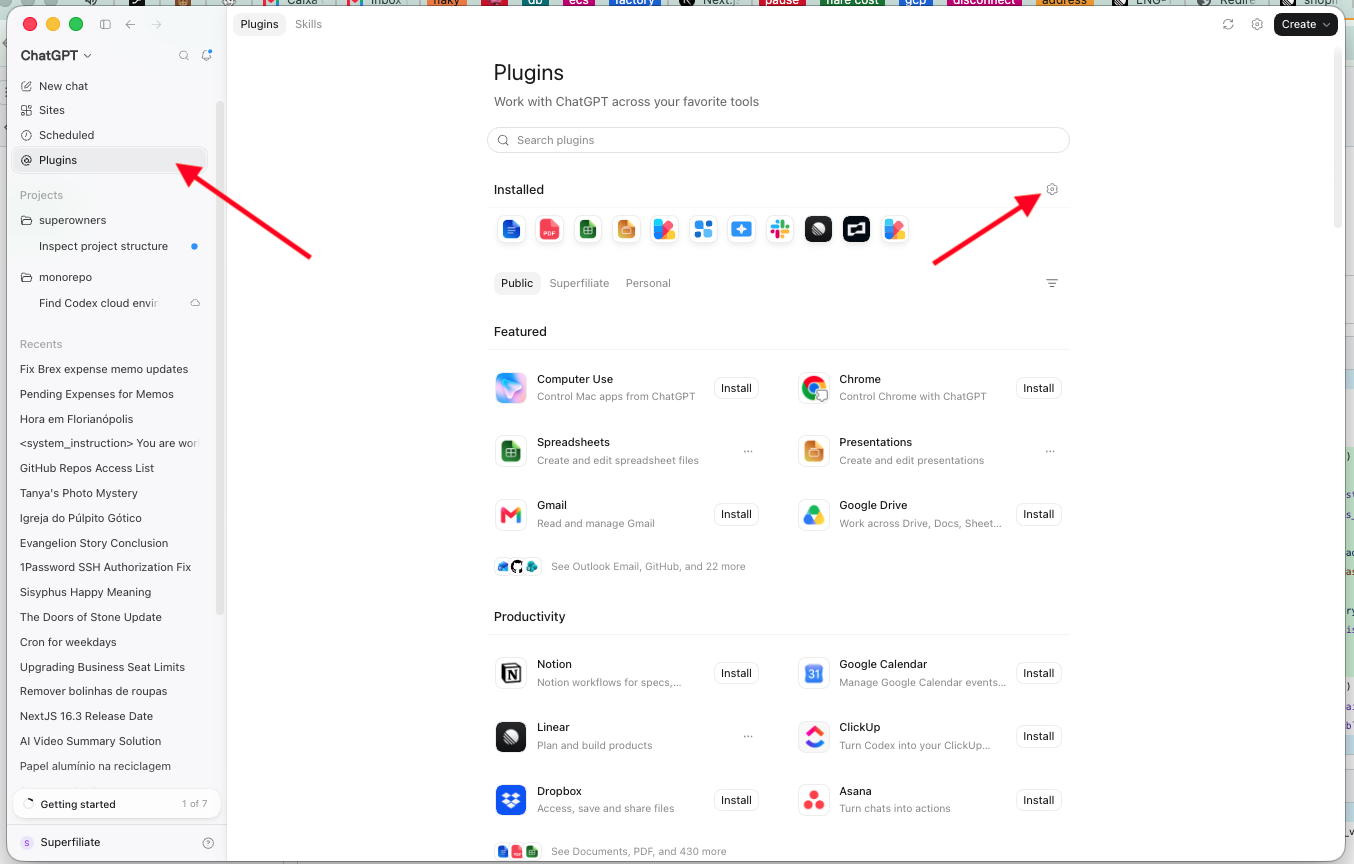
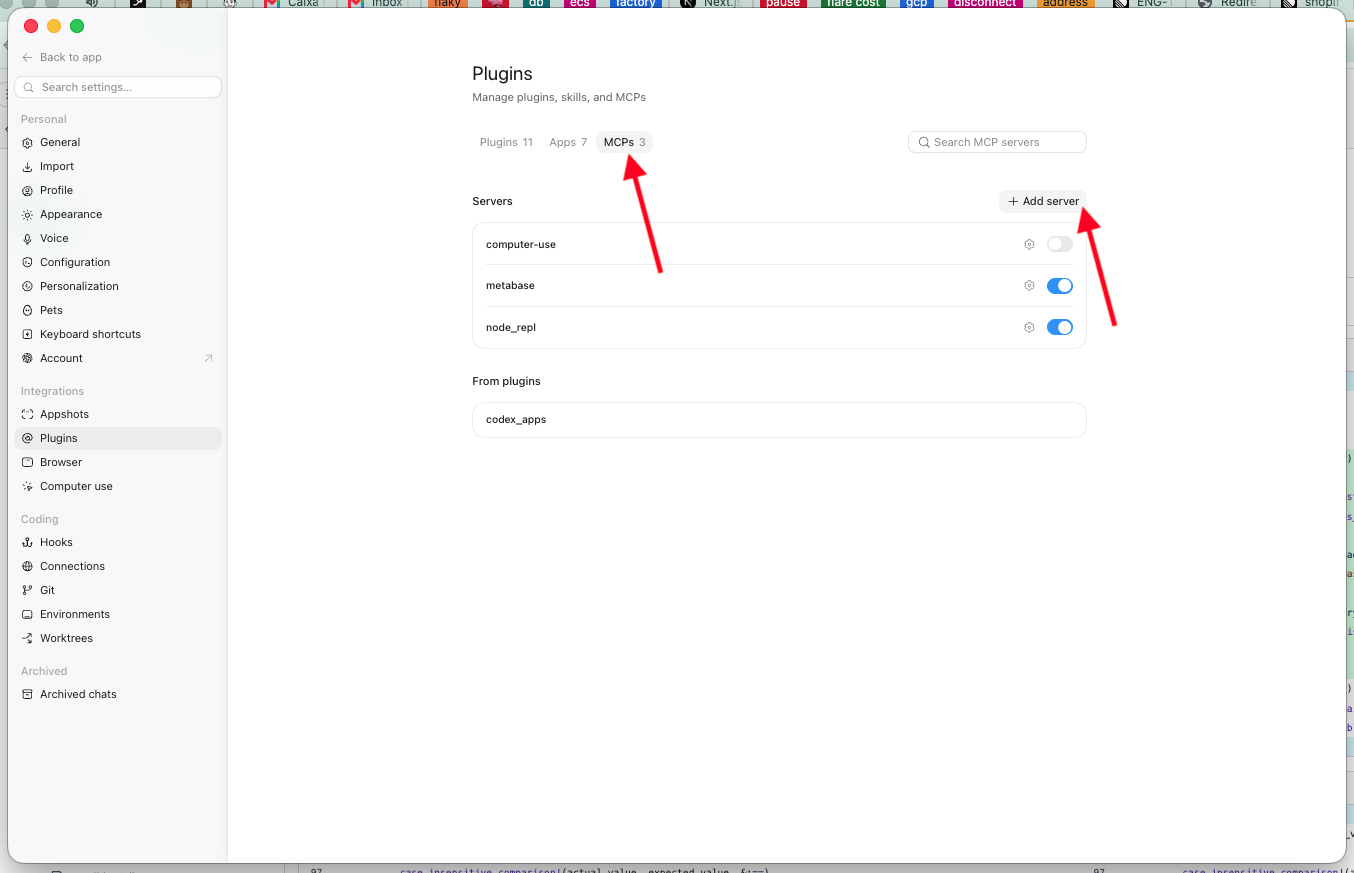
This opens the Plugins management page. Click the "MCPs" tab, then "+ Add server."
Fill in the connection details:
Name: Superfiliate
Type: Streamable HTTP
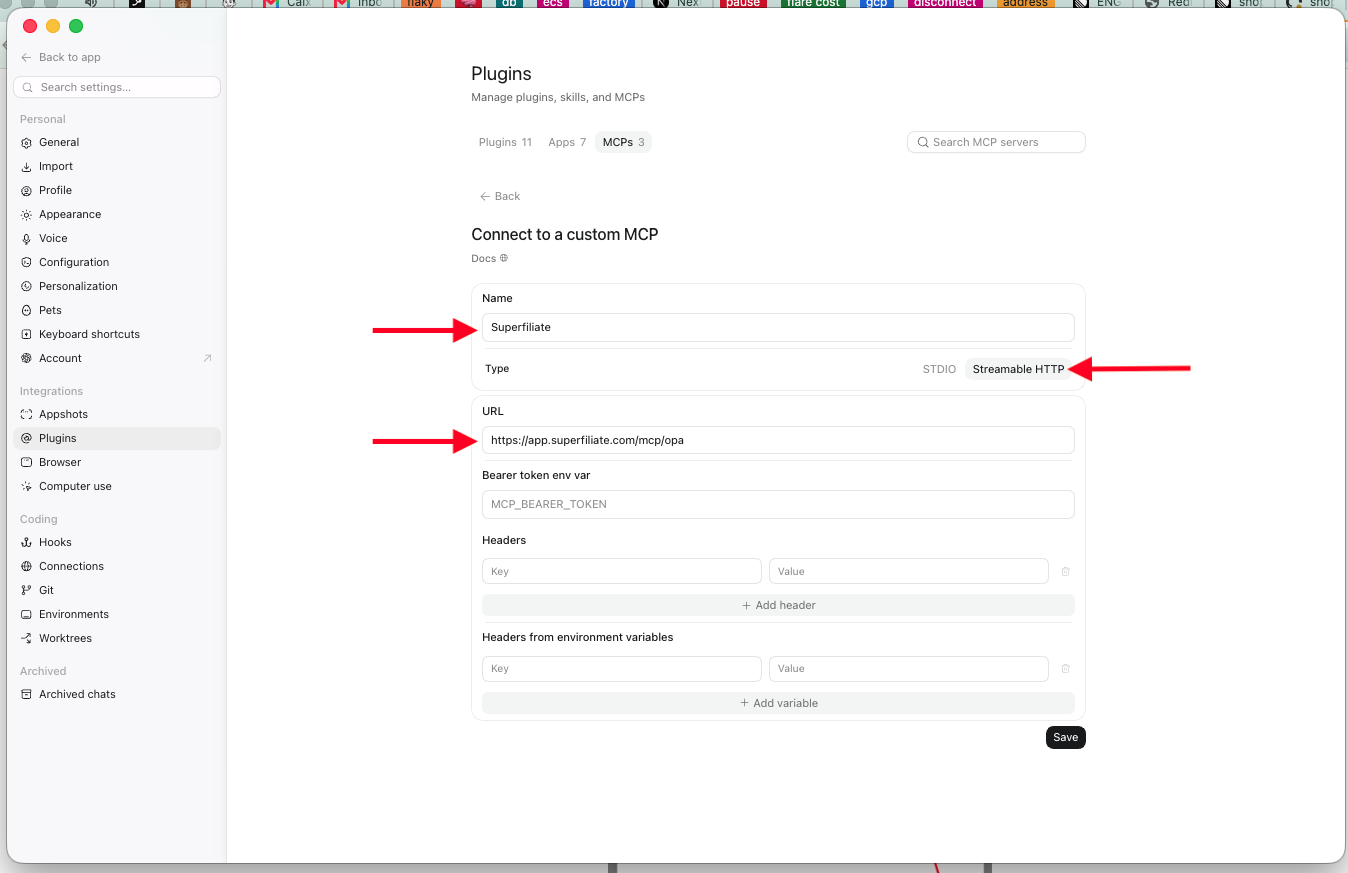
Click "Save."
The Superfiliate server now shows in your list of MCPs. Click "Authenticate" next to it.
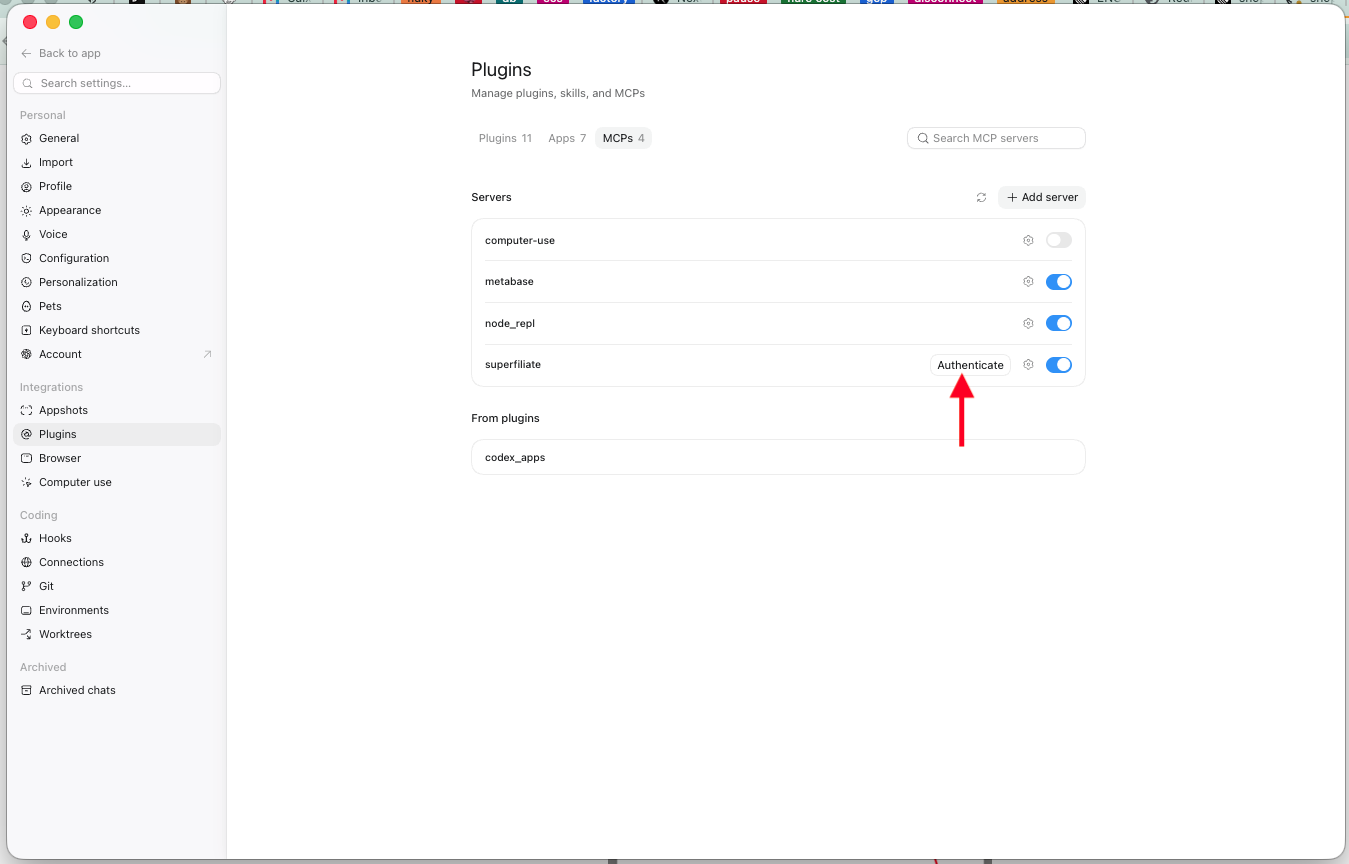
Sign in and authorize the shop you want to connect to.
Once authenticated, the Superfiliate MCP is live and ready to use.
Test it by asking ChatGPT about some Superfiliate data 🎉.
Codex, Gemini, Claude Code, Cursor, and others...
You should be able to connect it similarly to the Claude and ChatGPT flows shown above. Just keep in mind the https://mcp.superfiliate.com URL, that should be the important bit for you to fill in there.
We will improve these directions soon with more details on how to more easily connect it with more tools, and for less technical users.